If you are developing angular apps or you are owing angular apps or if you are deploying the angular apps then optimizing the deployment is the something which has great importance. Actually there are multiple ways in which you can optimize the angular deployment and one of those is Server Side Rendering (SSR). Angular officially recommends using Server Side Rendering for many reasons and it also provides a mechanism called Angular Universal to make your normal angular app to become compatible with Server Side Rendering.
Table of Contents
What is Server Side Rendering ?
Server Side Rendering is a mechanism by which you can render the client-side or universal app to HTML on the server. That means, you are not directly rendering the app to the browser.
In general, when we hit any web application which is not functioning with SSR, we tend to download the front end directly from server whereas in SSR you don’t directly download the client-side.
In Server Side Rendering, we don’t send lots of JavaScript to the client. This means, in SSR, we only send text and links to the browser and rest everything is handled at server side.
If we say it in one statement then SSR handles all logic, data fetching, templating and routing on the server and not on client side. You can read more here.
How to implement Server Side Rendering in Angular ?
Angular provides a wonderful feature called Angular Universal which can convert our normal angular app to a Server Side Rendering app. This Angular Universal is nothing but setting up a dummy express server in our front end so that we can actually make use of this server and render our application via server. This Angular Universal has made it very easy to implement SSR in our app.
So before implementing Angular Universal I would recommend you to use the latest version of angular so that it does not give any problem while using the commands for Angular Universal.
Here are some easy steps to get to the latest version of angular.
How to update your app to the latest version of angular ?
This looks very easy to many but perhaps this is the most crucial step for developers. Whenever they try to use the update commands, they will end up with lot many errors. They generally use the below command and encounter many errors.
ng update @angular/core@12 @angular/cli@12If you want to use the above command, you can use but then you may have to manually fix many things. Here I try to make it easy and better. Just check the below steps.
1. Go to your package.json and check how many extra ‘dependencies’ and ‘devDependencies’ you have listed there. If you don’t know, just go here and compare your package.json with this one.
2. Any differences, you see in your version of package.json from the other one, you can park them aside. That means, you can keep the extra dependencies aside and just paste the package.json from here.
3. Now you have most recent versions of dependencies in package.json.
4. Remove ‘node_modules’ folder and also the package-lock.json file from your folder structure.
5. Now install all the dependencies again by below command.
npm install6. Once you install the dependencies, you will have all the latest versions. Now you should bring all those previous ‘dependencies’ and ‘devDependencies’ here which you have parked aside in step 2.
7. So now you have all the previous dependencies listed, you can install them by using the command given in step 5. That means use npm install again and if you see any errors while installing, you should check the logs and find out which package is actually causing the error. This happens when the packages are not updated by third parties and because of which they are not compatible to align with other dependencies.
8. If you have any dependencies/packages creating issue during installation then you should try to find out an alternative to them. You have to remove those dependencies which are creating issue.
9. Once you have all the dependencies installed, you should run the application using below command.
npm start

Or ng serve

Or use npm run ng serve (If you don't have admin rights)
10. You may still find some issues while compiling the application because the new angular versions always come with some new features and new changes to the implementation so you have to abide by those changes. You can easily do those changes by searching angular official documentation.
11. If you are updating from very old version of angular to latest then you will see lot many errors. In that case, you may follow the recommended approach to update the app i.e. to use the ‘ng update’ command.
Now that we have angular latest version in place, we will add the angular universal dependencies so that we may take advantage of angular universal.
How to use Angular Universal in our angular application ?
So now we are ready to install Angular Universal in our app. If you have not already updated your app to the latest version of angular then please do that so that you don’t find any issues.
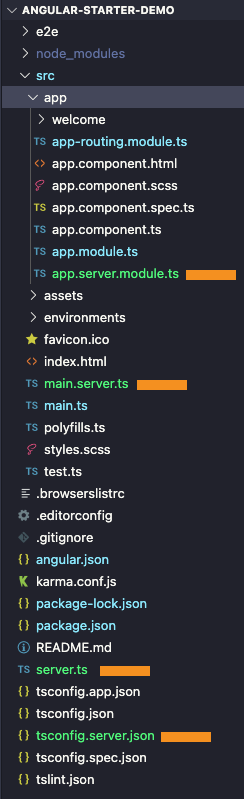
We will use a simple command to add all the dependencies of angular universal. This one command will add 4 new files to our folder structure and update 5 other files.
ng add @nguniversal/express-engine

Or npm run ng add @nguniversal/express-engine (If you don't have admin privileges)
After installing, It will look like below.
Now if you want to run your angular universal application, you will have to use below command only.
npm run dev:ssrLet’s now learn to deploy the angular universal application to NGINX server.
How to deploy your angular universal application with NGINX server ?
It’s time to deploy the angular universal application to NGINX server. For this to happen, we need below things.
1. A hosting server
2. A static IP
3. An NGINX server
So for setting this up, you can follow my previous article by following which you will be able to set up a free AWS EC2 Ubuntu instance with NGINX server and you will also get a free static IP. Here are the highlights of article.
- The article helps you to install an AWS EC2 ubuntu instance with complete steps.
- The article also articulates ‘How to connect to AWS EC2 Linux (Ubuntu) Server using RDP Client?’ but you can skip that.
- Article also illustrates ‘How to set up a MEAN app to EC2 ubuntu server’. If you are using an application without a backend and a database then you must skip ‘Install packages for back-end’ and ‘How to install and set up MongoDB in Ubuntu NGINX Server’.
- At the end of this article, you must have an angular application deployed to Ubuntu NGINX server with https.
Once you are done with this, you can follow the further steps. I am considering that, you have already converted your angular app to angular universal, you have an nginx server set up with SSL certificates and you have also cloned your angular universal application to the /var/www/html/front-end. Here you will see some changes to the previous article. Please follow these steps directly in putty terminal.
1. We will create a new build now. So use the below command.
cd /var/www/html/front-end
sudo npm run build:ssr
This will generate a dist folder with two sub folders, ‘browser’ and ‘server’. We will render our application using main.js file inside ‘server’ folder. Please note that this build will have the most optimized version of your code.
2. We will change the NGINX server configuration so that our app can render from server side. Go to the site configuration file by following below commands.
cd /etc/nginx/sites-available
ls
sudo vim <your-site-name> (Write the name of your config file which you get from 'ls' command)
Change the file like below.
#http
server {
    listen 80;
    listen [::]:80;
    server_name <your-site-name>.com www.<your-site-name>.com;
    return 301 https://$server_name$request_uri;
}

#https
server {
listen 443;
ssl on;
ssl_certificate /var/www/html/ssl/bundle.crt;
ssl_certificate_key /var/www/html/ssl/server_private.key;
server_name *.<your-site-name>.com;
access_log /var/log/nginx/nginx.vhost.access.log;
error_log /var/log/nginx/nginx.vhost.error.log;
root /var/www/html/<location-of-your-browser-folder-inside-dist-folder-where-index.html-is-listed>;
index index.html index.htm;

location / {
        try_files $uri $uri/ /index.html?$args;
        proxy_pass http://localhost:4000;
        proxy_http_version 1.1;
        proxy_set_header Upgrade $http_upgrade;
        proxy_set_header Connection 'upgrade';
        proxy_set_header Host $host;
        proxy_cache_bypass $http_upgrade;

}


location /api/ {
    proxy_pass http://localhost:4000/;
  }
location = /favicon.ico {
    access_log off;
    log_not_found off;
  }

  location = /robots.txt {
    access_log off;
    log_not_found off;
  }

  location ~* \.(js|css|png|jpg|jpeg|gif|ico)$ {
    expires max;
    log_not_found off;
  }
}
3. Now go to the root folder by using below command.
cd /var/www/html/front-end4. Install ‘forever’ for running the application even when the terminal is closed. I am using ‘forever’ because ‘pm2’ has lot of issues.
sudo npm install -g forever5. Run the application like below.
forever start <location-of-the-main.js-file-located-inside-server-folder-of-dist>

e.g. forever start dist/............../main.js
This way, you will be able to run the angular universal application. You can check your app at your domain. Also if you want to use the gzip compression for your application to speed up the performance, you can check below.
How to use gzip compression in an angular universal app
Generally, there are two ways to use gzip compression. The first is to do gzip compression at front-end and keep the zipped files at server so that server can render compressed files and second way is to allow server to compress the files and then render. The first way is better and is called static compression. Static compression is much faster than dynamic compression (On the fly server compression). Let’s learn it step by step.
Below steps are for angular front-end application and you should not follow them directly at server.
1. Install gzipper in your angular universal app by using below command.
npm install -s gzipper2. Go to your package.json file and under “scripts”, change the command like below.
"build:ssr": "ng build --configuration production && gzipper compress ./dist && ng run <app-name>:server",Now create a build at server again.
cd /var/www/html/front-end
sudo npm run build:ssr
Now if you check your ‘browser’ folder inside ‘dist’ folder, you will see zipped files along with normal bundle files. Let’s now change the nginx configuration in server. You will have to go to nginx config file like below and make changes.
vi /etc/nginx/nginx.confUnder this file, you have gzip section already. Go there. It will be like below.
gzip on;
#gzip_vary on;
#gzip_proxied any;
#gzip_comp_level 6;
#gzip_buffers 16 8k;
#gzip_http_version 1.1;
#gzip_types text/plain text/css application/json application/javascript text/xml application/xml application/xml+rss text/javascript;
You should change it like below. Remove hash from all the statements and add ‘gzip_static on;’
gzip on;
gzip_static on;
gzip_vary on;
gzip_proxied any;
gzip_comp_level 6;
gzip_buffers 16 8k;
gzip_http_version 1.1;
gzip_types text/plain text/css application/json application/javascript text/xml application/xml application/xml+rss text/javascript;
Save it and that’s it. Restart the NGINX server.
sudo /etc/init.d/nginx restartThat’s pretty much it. If you have any further questions, please ask them in comment section.
Aside from being an engineer, I am a software developer, an enthusiastic musician, a regular reader and a hobbyist writer. I love traveling, exploring new places and, of course, playing games (all sorts).
What is the difference between the browser and server directories created? I’ve always initiated the main.js file from the server directory and not the browser, but I’ll admit its purely through coincidence. Do you not need to initiate it from the server folder to get the benefits of SSR ?
When it comes to SSR, your app is pre rendered from server side, that means first rendering happens at server side so that the time which is consumed to compile whole lot of files at client side can be saved. Although, once the app is rendered from server then all further interactions are handled at client side.
When you create a build using SSR, it creates two directories, browser and server. Browser directory has client side (html, css, js) of the application which is called as front end and then server directory (back end) will have the server being created in which the identifier of front end will also be mentioned and that will internally read browser files when you kickstart the application using main.js. Also main.js is mostly created in server and that’s why you have mostly initiated main.js from server directory but that main.js may not be having identifier of front end to run it. Also don’t get confused with main.ts which is an entry file of angular application and located inside browser side of application.
Yes, you will have to initiate main.js from server only to get the benefits of SSR.
Hi there, how can be sure that is being served server side? does network on Developer tools show something diferent, for example?
Hi Filipe,
Just check this website’s (https://conversionbucket.com/home) page source. You will not see anything of the front end here. That verifies that, the website is rendered from server side.
Namaste! great article! Loved all the points abut the article. This indeed assists a lot of people with their own strategies.
We had the need to implement compression, angular universal integration to our angular app, universal integration with nginx server and implemented all of these things just a few days ago. This blog helped us validate the approach that we took. Also, we are yet to implement the last step which is to integrate universal with angular. we will try the steps this week.
If you could also blog about how to send 404 status for a missing page, that would be great! we are currently sending a 200 response for that.
XoXo,
Manasa
https://www.genzers.ai
https://www.genzers.tech
Thanks you!
In Angular, you can send a 404 status for a missing page by creating a custom route handler and returning a Response object with the appropriate status code. Here's an example of how you can achieve this:
Create a file named not-found.component.ts (or any suitable name) for handling the "404 Not Found" page. This component will be displayed when a route is not found.
import { Component } from '@angular/core';
@Component({
template: '404 - Page Not Found',
})
export class NotFoundComponent {}
Create a file named not-found.component.html and add the desired HTML markup for the "404 Not Found" page.
In your routing module (e.g., app-routing.module.ts), import the NotFoundComponent and add a wildcard route that matches any unrecognized URL. This route will be responsible for displaying the "404 Not Found" page.
import { NgModule } from '@angular/core';
import { RouterModule, Routes } from '@angular/router';
import { NotFoundComponent } from './not-found.component';
const routes: Routes = [
// your other routes go here
// Wildcard route for handling unrecognized URLs
{ path: '**', component: NotFoundComponent }
];
@NgModule({
section. This tag is necessary to ensure proper routing behavior.imports: [RouterModule.forRoot(routes)],
exports: [RouterModule]
})
export class AppRoutingModule { }
In your index.html file, add a
Finally, configure your web server to return a 404 status when a route is not found. The exact steps for this will depend on the web server you are using. For example, if you are using Angular's default development server (ng serve), it already handles returning a 404 status for missing routes.
By following these steps, Angular will display the "404 - Page Not Found" component and return a 404 status code when a user navigates to a non-existent route.
We did try that.. it indeed goes to a custom 404 page already.. ex: https://www.genzers.ai/badpage you will notice that it takes you to a 404 page. however, the code returned used to be 200. after certain tweaks, it changed to a 304 strangely. we would however want it to be a 404.
Hi,
You will have to debug it and take help of Google/ChatGPT. Without seeing the code, I will not be able to help you on this. Thank you!