Well, the title is lengthy but the process is not. Without wasting time, let us start the process.
Table of Contents
How to create an AWS EC2 Linux (Ubuntu) Server Instance ?
Well, I have created an article for people who want to host their .net applications on AWS EC2 Windows Server. This article has step by step guide to host the .net application over windows server. This article will also help you to know, how to create a windows server instance on AWS EC2. Check the wonderful article here. If you have read this article then I am sure, creating an Ubuntu instance (Which is a flavor of Linux server) will be very easy for you. However, I will help you again with important steps.
If you have not yet registered or created an account with AWS then please follow How to register on AWS. Once you are registered or signed up. You will have to create an instance. Sign in with AWS credentials and go to EC2 Dashboard.
Note: Before you launch your instance, you should change the server location to your own country otherwise the ubuntu remote machine will be very very slow. See the below screenshot, where I change the server location to Asia Pacific (Mumbai).

Now follow the below steps to launch the instance.
1. Go to ‘Instances’ located at the left hand side menu.
2. Click on ‘Launch Instance’.
3. Choose the instance called ‘Ubuntu Server 20.04 LTS (HVM)‘. This is the latest as of now. AWS features many other linux server images but in this guide we will use Ubuntu Server and this image comes under free tier.

4. In the next step, you will select the type of instance which will be by default ‘t2.micro’. Keep this selection and do not change it.
5. Click on ‘Review and Launch’ located at the bottom.
6. Next comes the ‘Step 7: Review Instance Launch’. Check the instance details and click on ‘Launch’ button located at the bottom.
7. Create a key pair which is kind of replacement to password and will be used to log into the server. Name it and download it.

8. Click on the ‘Launch Instances’ button you see at the bottom.
9. You have an instance running now. That means, you have a ubuntu server image running.
Note: Below we are learning, how to connect AWS EC2 Linux Server using RDP client. If you want, you can completely ignore this section and move to next section.
How to connect to AWS EC2 Linux (Ubuntu) Server using RDP Client?
This is perhaps not required for this tutorial but then we will set up a RDP client for those who are wishing to see the virtual ubuntu server in real time. They will be able to see everything happening over there.
Before getting into RDP client set up, just create a security group setting to allow connection from RDP at port 3389.
1. Click on the ‘Security Groups’ located at the left hand side of ‘EC2 Dashboard’.
2. You will see security groups assigned.

3. Select the first rule and then click on ‘Edit inbound rules’ under ‘Actions’ tab.
4. Just edit them. Keep the rule for SSH already located. Add one rule for RDP and the same way for HTTP and HTTPS. Source will be same for all.

Now let’s set up things to connect the machine using RDP (Remote Desktop) Client.
Go to ‘Instance’ again located at the EC2 Dashboard. Here you will see your running instance. Just select that running instance and click on ‘Connect’ button located above. You will see a screen like below.

Just be on the first tab which is ‘EC2 instance connect’. Click on the ‘Connect’ button located below. Once you click there, you will have a new screen which will open in a new tab. This is a kind of SSH terminal from where you can control your instance.

In the terminal, the first thing we will do is to change the password for ‘ubuntu’ user. Type
sudo su -# Provide a password for the "ubuntu" user. Just type below command and press enter.
passwd ubuntuEnter the new password in the next step and confirm it. Please note, you will not see the password in the terminal.
Next, we will install Ubuntu desktop packages. Use below command to do that.
sudo apt update
sudo apt install ubuntu-desktop
Ubuntu desktop will take time to install so please wait. Once it is completed, we will install xrdp to allow RDP connections with below command.
sudo apt install xrdpProvide the Firewall permissions, allowing RDP (running at port 3389) to go through the local firewall.
sudo ufw allow 3389/tcp
# Restart xRDP
sudo /etc/init.d/xrdp restart
Now you can connect to your linux (Ubuntu) server using RDP client. You have below options.
- If you are running a Windows machine, use the inbuilt RDP connection application.
- IF you are using MAC then you can make use of Microsoft Remote Desktop.
- Remmina can be used with any other platform.
Mostly, we are using Windows. So we can just type ‘RDP’ in your search bar and you will see a Remote Desktop Connection client like below.

Click on ‘Show Options’.

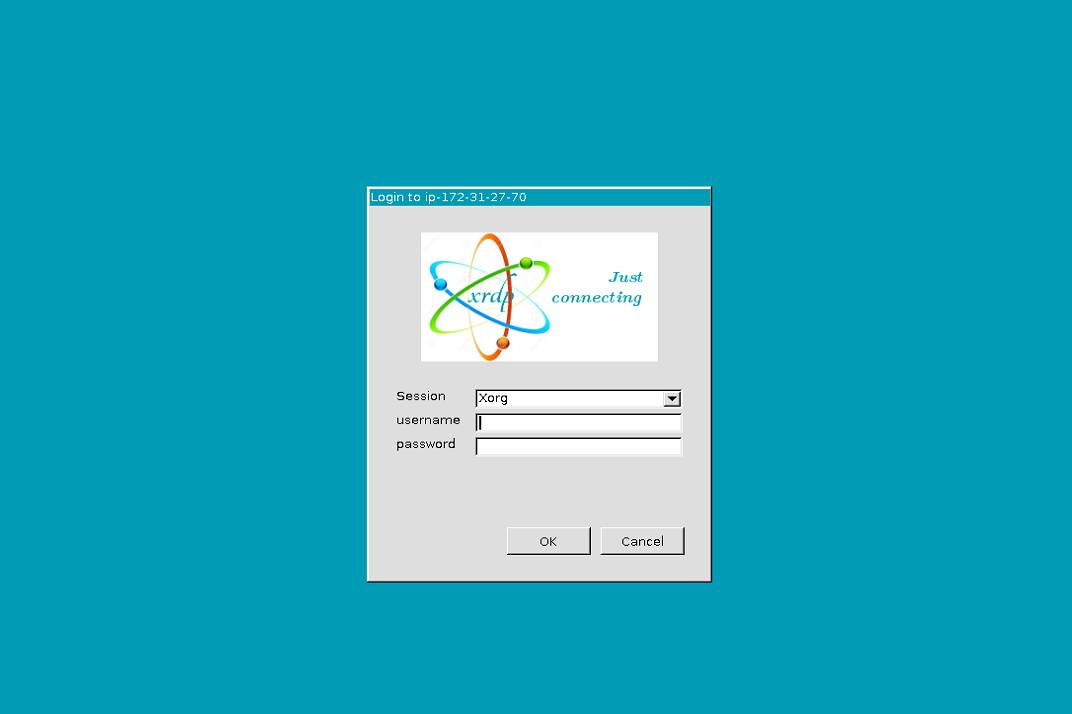
Enter the public IP of your AWS instance (Just check the last screenshot referring to SSH terminal, you will be able to see the Public IP at the bottom.) in the Computer field and ‘ubuntu’ as username. Next, click on ‘Connect’ button. Once you input that, you will see a screen like below. Enter the password and it will be the password you have changed in the earlier step.
This way, you will get into your Linux (Ubuntu) server.
Now you should hold an Elastic IP or a Static IP from AWS EC2 so that in case of any shutdown to your instance, you will not end up changing your public IP. You can refer this link to create an elastic IP. Once you get an Elastic IP connected to your instance, you should point your domain to this Elastic IP. Refer this for help.
How to deploy your MEAN Stack (Angular + Node) application to ubuntu nginx server ?
We will need below applications to deploy angular application to ubuntu nginx server.
1. GIT
2. NPM and NODE.js
3. MongoDB if you have Mongo DB in application
4. NGINX web server to make the application accessible via http
5. Angular CLI to compile the angular code and create a build.
6. PM2 Process Manager to run your node process forever even if you close the terminal and instance
Let’s install them all.
sudo apt-get update
sudo apt-get install -y git
sudo apt-get install -y npm
sudo apt-get install -y nodejs
sudo apt-get install -y nginx
sudo npm install -g @angular/cli
sudo apt-get install -g pm2
Now there are two ways to pull your application into server.
1. GIT
2. FTP
If you are using GIT repository then you can directly use below command to pull the project. For this tutorial, we will create an app called ‘Registration and login using angular, node and mongo’. So we have already created two repositories for this app. Now all you have to do is to create two new folders at /var/www/html location. You can name them as front-end, back-end and clone the GIT repositories like below.
cd /var/www/html/front-end
sudo git clone https://github.com/ByVikasBansal/registration-login-angular.git
cd /var/www/html/back-end
sudo git clone https://github.com/ByVikasBansal/registration-login-api-node-mongo.git
But if you are using FTP clients like FileZilla or WinSCP then you will be needing permission to transfer files to var/www/html folder. Type below command and give permission to ubuntu user.
chown -R ubuntu /var/www/htmlDon’t allow ubuntu user to access /etc folder otherwise, you will have issues running your instance using ssh terminal. Please use the above command as it is. If you by mistake make ubuntu as owner then you should change it back to root by using below command.
pkexec chown root:root /etc/sudoers /etc/sudoers.d -RUse above command only if you have made mistake, otherwise not. Now just open WinSCP/FileZilla or any other FTP client, connect using public IP and private key (converted into .ppk). Transfer all your front-end files to /var/www/html/front-end folder located at the root. Don’t transfer node_modules folder. Transfer all your back-end files to /var/www/html/back-end.
Install packages and build front-end
Create a build of front-end so that we can use compiled files directly. You can use below commands to create build.
cd /var/www/html/front-end
sudo npm install
sudo npm run ng build --prod --build-optimizer
Once you do this, you will get a dist folder at your root location after creating build. You will have to use this dist folder to deploy.
Install packages for back-end
Now we will create build for back-end also by following commands.
cd /var/www/html/back-end
sudo npm install
How to install and set up MongoDB in Ubuntu NGINX Server
If you are planning to host the MongoDB in the same server then you can install it by following the guide at this location. You also have an option of creating cloud cluster on MongoDB. They provide free cluster in shared plan which is free with limitations. But hosting on cloud will speed up your application.
If you check the file config.json located at the root of back-end folder, you will see a line like below.
"connectionString": "mongodb://localhost/registration-login-api-node-mongo"This itself shall create a database named registration-login-api-node-mongo but if it does not work then you can create one database with one user having access to it.
mongo
use <db-name>
db.createUser(
{
	user: "<username>",
	pwd: "<password>",
	roles:[
	{
		role: "readWrite" , db:"<db-name>"
	}]
});
Change the connectionString now to something like this.
"connectionString": "mongodb://username:password@host:port/<db-name>"By default, the host is localhost and port is 27017. You can change the port for more security. I am not covering that here. Now you can run the back-end easily by following the below commands.
cd /var/www/html/back-end
sudo pm2 start server.js
How to configure NGINX to run your application at your domain (http configuration for nginx)
Follow the below commands to configure all the http requests to nginx server.
cd /etc/nginx/sites-availableCreate a file your with your site name.
sudo vim <your-site-name>Update the file with below content. Type ‘i‘ once you are inside the file to input changes and after changing everything, press ‘ESC‘ key and type ‘:x’ to save and exit.
#http
server {
    listen 80;
    listen [::]:80;
    root /var/www/html/<location-of-your-dist-folder-where-index.html-is-listed>;
    index index.html index.htm;
    server_name <your-site-name>.com www.<your-site-name>.com;
    location / {
 	# First attempt to server request as file, then
        # as directory, then fall back to displaying a 404.
    try_files $uri $uri/ /index.html?$args =404;
  }
 # node api reverse proxy
  location /api/ {
    proxy_pass http://localhost:4000/;
  }
location = /favicon.ico {
    access_log off;
    log_not_found off;
  }

  location = /robots.txt {
    access_log off;
    log_not_found off;
  }

  location ~* \.(js|css|png|jpg|jpeg|gif|ico)$ {
    expires max;
    log_not_found off;
  }
}
Please remember, “root /var/www/html/<location-of-your-dist-folder-where-index.html-is-listed>” located inside above code will look for index.html file inside your code. So before mentioning this, please check the dist folder and ensure that the index.html file is inside it or there is one more subfolder to locate the index.html file. After checking, please mention the correct location here. Now follow some more commands to make nginx aware about the config changes.
cd /etc/nginx/sites-enabled
sudo ln -s ../sites-available/{your-site-name}
ls -l
sudo rm default //removes default directory
Check your domain now. It will mostly serve your application.
How to configure NGINX to install SSL certificate (https configuration for nginx)
In order to do this, you should have SSL certificates and private key. There are three SSL certificates generally.
1. Root Certificate
2. Server Certificate
3. Intermediate Certificate
If you have received a bundle from your CA (Certificate Authority) then there is no worry but if you have received them individually you have to bundle them. Sometimes, the CA will issue only two certificates, Root and Intermediate. But that does not matter much. If you have not received all three, that means they are in combined form. So do not worry and open them all in notepad. The idea is to combine them all in one file. Here is the order in which you should combine them.
If root and server are one certificate then arrange them like below and save the file in .crt extension.
-----BEGIN CERTIFICATE ROOT + SERVER CERTIFICATE-----
-----END CERTIFICATE-----
-----BEGIN CERTIFICATE INTERMEDIATE CERTIFICATE-----
-----END CERTIFICATE-----
If root and server are not in one certificate then arrange them like below and save the file in .crt extension.
-----BEGIN CERTIFICATE SERVER CERTIFICATE-----
-----END CERTIFICATE-----
-----BEGIN CERTIFICATE INTERMEDIATE CERTIFICATE-----
-----END CERTIFICATE-----
-----BEGIN CERTIFICATE ROOT CERTIFICATE-----
-----END CERTIFICATE-----
You should name this file as bundle.crt. Along with these certificates, you also have a private key which you can rename as server_private.key. Now you should create a new folder with name ssl inside /var/www/html and move both of these files to this folder using FTP. If you want, you can upload them to your GIT repository under same location and take a pull from git to update the code inside server. Now use below commands to configure https requests.
cd /etc/nginx/sites-available
sudo vim <your-site-name>
In this file, you will find a #http section where we will make changes to redirect all requests to https and we will add one more section that is #https section. Your final code should look like below.
#http
server {
    listen 80;
    listen [::]:80;
    server_name <your-site-name>.com www.<your-site-name>.com;
    return 301 https://$server_name$request_uri;
}

#https
server {
listen 443;
ssl on;
ssl_certificate /var/www/html/ssl/bundle.crt;
ssl_certificate_key /var/www/html/ssl/server_private.key;
server_name *.<your-site-name>.com;
access_log /var/log/nginx/nginx.vhost.access.log;
error_log /var/log/nginx/nginx.vhost.error.log;
root /var/www/html/<location-of-your-dist-folder-where-index.html-is-listed>;
index index.html index.htm;
location / {
 	# First attempt to server request as file, then
        # as directory, then fall back to displaying a 404.
    try_files $uri $uri/ /index.html?$args;
  }
location /api/ {
    proxy_pass http://localhost:4000/;
  }
location = /favicon.ico {
    access_log off;
    log_not_found off;
  }

  location = /robots.txt {
    access_log off;
    log_not_found off;
  }

  location ~* \.(js|css|png|jpg|jpeg|gif|ico)$ {
    expires max;
    log_not_found off;
  }
}
And here is the last command before we sign off to restart nginx so that we can see all the changes.
sudo /etc/init.d/nginx restartThis will start your domain at https. Hope this article will help you deploy your MEAN app at AWS EC2 Linux Server (Ubuntu). If there is anything you want to ask, please let me know in comment section.
Aside from being an engineer, I am a software developer, an enthusiastic musician, a regular reader and a hobbyist writer. I love traveling, exploring new places and, of course, playing games (all sorts).